Find crafts made from natural materials about autumn. Autumn crafts (77 ideas for adults and children)
Autumn crafts for kindergarten become a real mirror in which the beauty of autumn is reflected. How to make autumn crafts for kindergarten with your own hands?
To create interesting autumn crafts with your own hands, you can use various materials.
Autumn crafts from leaves
For example, it is easy to make beautiful appliques from leaves. All you need is to select the leaves of the desired shape and color and pre-dry them under pressure. You can do without drying, especially if children will be working with the leaves - it is easier for them to handle durable and elastic material. It is enough to add eyes to the leaves and they transform into animals.

From leaves and a paper plate you can make a favorite children's character - a hedgehog.

Applique of dried leaves “tree”. To create such an applique, glue a brown trunk with branches onto a white sheet of paper. Here is a wonderful example of a seabed leaf applique.

Application of leaves “sea bottom”
The base of the craft can be made from a leaf painted with watercolors.

Painting from leaves “sea bottom” You can make a real autumn fairy out of autumn leaves. We decorate the base with watercolor stains. We cut out the fairy's hands and head from paper. After the base has dried, glue the head. Around the head we draw a sketch of the future craft with a pencil.

From the head we begin to assemble the entire image of the fairy. The hair, crown, body and arms find their place. A lush fairy dress gives you immense scope for creativity.

A touching autumn craft can be made from leaves and a child’s handprint.

And this is a charming turkey made from paper and maple leaves.

Leaves and other natural materials are used to create an autumn beetle applique.

Autumn applique “beetle”
A video master class will help you make a rose from maple leaves:
Autumn crafts from salt dough and plasticine
The unique shape of autumn leaves can also be used to create original pendants. For example, cut out leaves from salt dough. To do this, we paint the salt dough in autumn colors.

We crush the multi-colored pieces into a single mass.

Using molds or a plastic clay spatula, cut out the leaves.

Dry and coat with clear varnish.

You can make an interesting herbarium from salt dough. We make a round base of the craft from salt dough. We leave an imprint on it with a real leaf.

First we paint the print itself with bright colors. Then we cover the rest of the craft with a thin layer of varnish or paint.

Autumn paintings from plasticine
A real masterpiece on the theme of autumn and study can be created from plasticine. First, we make a suitable sketch in pencil (or print it out from the Internet).

Sketch on the theme “start of school and autumn”
We make a background from a thin layer of purple plasticine. On this one we glue a globe and a book made of plasticine.

Glue letters, pencils, a pointer and a sprig of autumn maple on top. Autumn application made from plasticine - ready!

You can make a real “autumn in the forest” picture from plasticine on cardboard. We start work with the birch trunk.


Autumn crafts for kindergarten from pine cones
You can make a charming forest hedgehog from salt dough and fir cones. To make it you will need a fir cone, which is then disassembled into individual scales. These scales decorate the hedgehog's body. The body itself is molded from salted dough.

If you want to make a large hedgehog, then you can use a plastic bottle as a base. We color the top part of the bottle with a black marker - this is the future face of the hedgehog. Glue the fabric to the bottle, leaving the painted part free. We glue the cones onto the fabric, trying to position them as closely as possible to each other.

When the entire surface with the fabric is covered with cones, all that remains is to glue paper eyes and ears to the hedgehog. We attach apples, nuts, mountain ash and twigs to the back of the hedgehog. Autumn hedgehog made from cones - ready!

Look at the video on how to make a hedgehog from cones using a bottle and plasticine:
You can make a charming squirrel with an acorn from a pine cone and felt. Squirrels with acorns are real symbols of autumn.

DIY deer made from pine cones and branches
You can make a proud autumn deer from a pine cone, twigs and an acorn. We attach the cones to each other using plasticine.

We attach the branches-legs to the plasticine.

We also use plasticine to glue the horns from twigs and the head from an acorn.

The neck of a deer can be made from a stick.

A very original deer can be made from sticks and branches.

From natural materials you can make a very beautiful autumn craft “nest with birds”. We weave a nest from thin twigs. We weave leaves into the bottom, covering the gaps between the branches. From cones, chestnuts and leaves we make a bird family - a mother and two little chicks. All parts of the craft are attached with glue. We glue the birds' eyes and beaks and place them in the nest. A nest with birds made from natural materials - ready!


Using the same technique, you can make topiary from leaves.

You can make a very cozy one out of cones.

To make this wonderful autumn turtle we need to find a base for it - a plastic plate or cup. Glue peas onto the cup.

We fix the cup with peas on a cardboard base. Glue on the eyes. Pea turtle - ready!

Autumn crafts from vegetables
You can build a real frigate from vegetables.

We make the sail from lightly boiled cabbage.

You can make paper sails for a boat - they will retain their beautiful appearance for a long time.

Experienced craftsmen, with the help of dad, will be able to construct a real airplane from zucchini and carrots.

From large and small zucchini you can make another worthy exhibit of the autumn exhibition - a turtle.

You can make a funny penguin family out of zucchini.

You can make a funny cat from onions and carrots.

A cucumber makes an elegant duck.

Another fun fall craft using vegetables and tomatoes is King and Queen.

It’s very easy to put together an elegant autumn “fly agaric” composition from cucumber and tomato.
You can make a very funny hare from vegetables. Using toothpicks, we connect two heads of cabbage together - this is the head and body of the bunny. We cut the zucchini into two parts - these are the future bunny legs. We cut the second zucchini and attach it to another head of cabbage - these are bunny ears. We make bunny arms from peeled zucchini. We make a face for him and attach a carrot. Our bunny is ready. It will decorate any autumn exhibition in kindergarten!

Autumn craft - bunny made from vegetables
Another great fall craft is an apple caterpillar. We fasten the apples together with toothpicks. We also use toothpicks to attach halves of carrots to the apples - these are the future legs of our caterpillar.

Using a toothpick, attach the head to the caterpillar. We decorate the head itself with eyes, mouth and horns. The craft is ready!

You can make adorable pigs out of potatoes and carrots. All parts of the craft are attached to each other using toothpicks.


DIY beet elephant
You can make an autumn elephant from beets. Using toothpicks, secure the two beet halves to create a head with ears.

We connect two beets with tails together using toothpicks - attach the body to the head.

We make him a pen from a cardboard box, put some paper grass and treat him with delicious nuts.

See what an amazing autumn zoo you can make from the gifts of autumn -.

You can use a pumpkin to make a luxurious vase for an autumn bouquet.

You can make a small festive bouquet from fruits and berries. Design - any, depending on the products available for sale.

Autumn crafts from needles, chestnuts, acorns, nuts, seeds
A wonderful autumn hedgehog is made from plasticine or salt dough. The hedgehog's coat is made from pine needles. Even the smallest children will find it interesting to decorate the hedgehog with needles, sticking them one after another into soft plasticine.

Also, many people loved the hedgehog made from seeds and plasticine. The traditional apple is made from a nut (you can even paint it red).


You can make a fast horse from acorns and matches.

A beautiful craft on the theme of autumn for kindergarten can be made from horse chestnuts and acorns - if you connect them with each other with a lump of plasticine, you get very natural mushrooms. Complement this composition with rowan berries and blades of grass - and you will get a real piece of autumn forest.

Another find for an exhibition of autumn crafts are mushrooms made from plasticine and walnut shells.

You can make a charming autumn squirrel from chestnuts and acorns. We make the squirrel's paws and tail from fluffy wire, its tummy from felt, and decorate its face with factory-made eyes. We attach all parts using a glue gun.

Chestnuts can be used to make a symbol of wisdom - an owl. We make the wings from chestnut shells.

You can make a very impressive deer from natural materials.

Autumn crafts from twigs
You can make a house from a cardboard box and hollow dry sticks. The roof of the house is decorated with leaves, and the roof is made of dry straw.

You can make an autumn beauty from corn. The autumn dress is made from corn leaves and decorated with berries and flowers.

Craft "autumn" from corn
Foamiran is a type of foam rubber. This material is durable and pliable, and can be very bright and colorful. Many needlewomen and teachers have already fallen in love with it. We decided to make an autumn bouquet from foamiran. We cut out autumn leaves: birch, maple and oak. We paint them with paints, trying to emphasize the pattern of veins and edges.

To make veins, we heat the sheet with an iron and firmly press down the twig - we will be left with a characteristic pattern.

We make an autumn vase from a plastic bottle and branches. We attach the branches using double-sided adhesive tape.

Place the leaves in a vase. We complement the bouquet with natural materials: dry twigs and cones. An autumn bouquet made from foamiran is a small piece of art that will decorate a group or classroom for years to come!

Autumn applications for kindergarten
An easy-to-make and beautiful applique is made from pieces of colored paper. The child crumples pieces of paper and, one by one, glues them onto the base - the crown of a tree.

This application is a little more complicated than the previous one. The child crumples the paper for the leaves and rolls the brown paper for the trunk and branches of the tree.

A very bright and beautiful applique is made from colored paper and a real branch. The difference in the execution technique is that in this applique, not pieces of colored paper are glued, but tightly twisted balls.

In this applique we glue paper rings.

A very original idea to make autumn foliage from eggshells or pasta. Pasta or shells are colored in colored water and then dried. The material for the autumn applique is ready!

The “autumn tree” applique, made using painted pumpkin seeds, looks very interesting.

You can use painted pumpkin seeds to make the pumpkin itself using the appliqué technique.

Pumpkin applique
If you use various ideas in your work, it is very easy to turn a kindergarten group into a real autumn kingdom.
Autumn crafts for kindergarten from paper
Paper leaves glued to a string make a very beautiful autumn decoration.

You can make a spectacular autumn garland from paper leaves.

Beautiful themed products can also be obtained using other available means - for example, using cardboard toilet paper tubes: they can easily be transformed into autumn tree trunks.

We insert autumn leaves, rowan branches and other gifts of autumn into the rolls. We place the trees on a thick sheet of cardboard and complement them with hedgehogs made of chestnut and plasticine. We will get a very simple but effective autumn composition.

You can make very cute hedgehogs out of paper.

Look at the video on how to make a fly agaric out of paper:
DIY origami autumn leaf
Look at the video on how to make an autumn leaf out of paper:
Making some colorful autumn leaves.

These leaves can be used to make a very beautiful autumn decoration.


Autumn cards and gifts for teachers and educators
A very impressive postcard as a gift for a teacher or educator can be made using the scrapbooking technique.

Another very beautiful idea for making a postcard on a school autumn theme is the “Apron Postcard”. Glue several layers onto the base. Before the last layer we glue the lace.

We decorate the card with an apron made of lace and ribbons.

As a gift to your favorite teacher or educator, you can make a stunning bouquet of sweets and corrugated paper.

Another example of an autumn bouquet of candies is a bouquet on a palette with pencils. All parts of the craft are inserted into a foam base wrapped in corrugated paper.

The palette is a cardboard base with lids filled with colored plasticine.

But we made such a beautiful stand for the office in the master class ““.

A plastic bottle makes an extremely original gift box with crayons. We fix the upper edges of the bottle with tape and decorate it with a ribbon and a bow.

As a gift to your favorite teacher or educator, you can make a bouquet of pencils and other stationery.

A charming girly pencil case - a watermelon for school and kindergarten. Watch a detailed master class on how to make this miracle:
Autumn drawings for kindergarten
An original master class can be given to children, teaching them how to put stamps using... an ordinary apple. To do this, prepare sheets in advance with the outlines of tree trunks printed on them.

Invite the children to paint the trunk and wide branches with paints. While the paints are drying, make stamps: to do this, you need to cut a small apple into two even halves. Then we put red paint on one half and yellow paint on the other and put prints around the barrel. It turns out to be a real autumn apple tree.

You can use wax crayons to draw spectacular autumn leaves. Place the piece of paper on a regular landscape sheet. We color the junctions of the paper and album sheets.

We remove our paper sheet. We will be left with the outline of the sheet on the paper. We use leaves of different shapes and paint them in bright autumn colors. We will get a very unusual drawing “Autumn leaf fall”

One of the famous painting techniques is painting with autumn leaves.

The leaves are dipped in paint, then pressed against a sheet of paper - a beautiful imprint remains.

Stamps made from vegetables and fruits are well suited for creating autumn designs. Look what an amazing flower you can make from “vegetable” stamps.

Ideas for autumn drawings for schoolchildren

Drawing “Clear autumn day with houses and a stream”

You can paint late autumn with white trunks of birch trees.

Drawing "autumn" with birch trees
Autumn painting made from natural materials
An idea that many will love is an autumn painting made from natural materials. As usual, making crafts should begin by collecting materials: branches, flowers, moss, leaves. We also need buckwheat, some paper, a file and glue.

Cover the space inside the owl with glue. Gently sprinkle with buckwheat. You can apply glue and sprinkle buckwheat section by section.

We glue various natural materials: leaves, moss, flowers. The autumn applique can also be supplemented with decorative figures.


Autumn applications:
We paint with paints:
Autumn crafts from plasticine:
Autumn cutting templates


Autumn crafts for kindergarten reviews:
I really liked animals made from vegetables)) (alevita)
I want to make chestnut and acorn mushrooms for my child’s kindergarten. (wera)
I like the sunflower hedgehog, but it’s hard to find a sunflower))
And the beauty of fading nature, and a rich harvest, and festive events in a child’s life - all this can become a source of inspiration for DIY "Autumn" crafts. It’s very easy to create beauty with your own hands, and our master classes will help you choose a theme for your next project for school, kindergarten, or simply to lift your spirits.
DIY crafts theme "Autumn"
So, what do-it-yourself crafts does the “Autumn” theme dictate to us? First of all, among all the associations with this time of year, the thought of golden and crimson leaves on the trees appears, nature magically transforms, putting on a fabulously beautiful outfit. Therefore, we can name those that, one way or another, glorify this feature. Here is the first example of such a product - a candlestick made from an unnecessary CD using the decoupage technique.
Getting the necessary material is not a problem - if you don’t have a matrix you don’t need, you can buy it specially, pick up a napkin made of multi-layer paper with a suitable print (in this case, golden leaves), and also buy a small candle in the shape of a flower, a leaf, or, in extreme cases, In this case, you can take an ordinary tablet, but make sure its color is in harmony with the shade of the base napkin. Separate the topmost layer on which the image is located, cut it to the size of your disk. The base must first be prepared and coated with white acrylic paint. Our goal is a thin, even layer to which the paper will easily stick, so you should not apply paint with a brush. It is better to use a piece of cup, which you can use to remove excess paint from the surface if necessary.
After complete drying, you can begin gluing; for this you can use both decoupage glue and regular PVA glue, diluted to the desired consistency. They need to glue the napkin on the bottom and on the top, which is why the glue must be liquid enough to saturate the paper layer. After everything has dried, apply an additional layer of varnish with a sponge, which will protect the craft. The final touch is installing the candle. You can make a holder that will tightly hold the candle or simply use the disk as a stand.

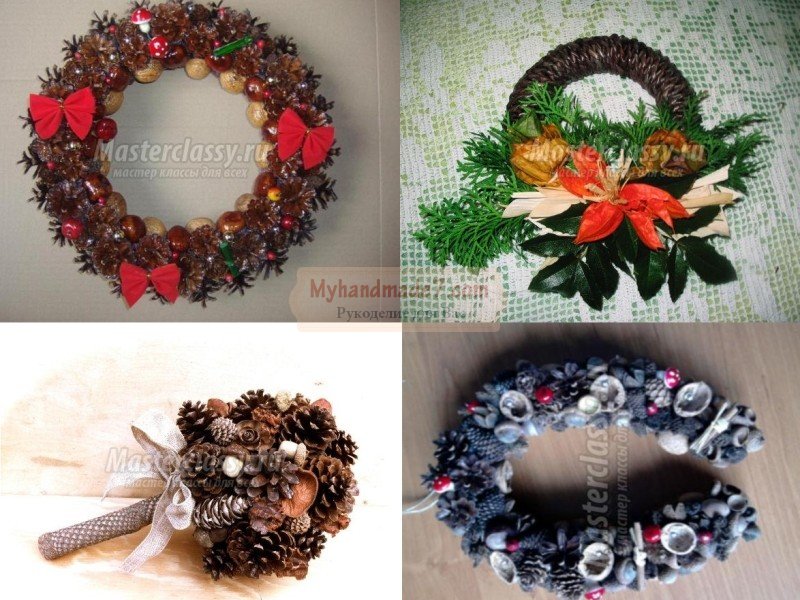
It is generally accepted that wreaths are the prerogative of Christmas crafts, while you can decorate your apartment with beautiful products made from natural materials in the fall, when acorns and pine cones are still fresh and beautiful and do not need to be prepared for future use. This wreath is quite simple to make; you only need a base and a sufficient amount of the necessary decor. In this case, the base is a foam ring, which is painted with paint to match the color of the elements chosen for the application. This way you will need to spend much less of them and the gaps between them will not be so noticeable. The easiest way to glue halves of nut shells, dried flowers, acorns and pine cones is with hot glue, so you don’t have to press them or deform them.
When the largest decor has been applied, you need to glue the smallest details between it - coffee beans, nuts, beads. Star anise and cinnamon sticks will look elegant. This way you will make the wreath not only beautiful, but also fragrant. The final touch is twine or twine, which is tied in bows. Using the same technique, it will also turn out beautiful, only you will not be covering a ring, but a foam ball.
DIY children's crafts "Autumn"
For both young children and schoolchildren DIY children's crafts "Autumn"“This is not only a creative activity, but also a lesson, because in the course of work they can learn a lot about the world around them, study autumn vegetables and fruits, compare the leaves of different trees, consolidate material about precipitation, the change of seasons, and so on.

Therefore, you should not burden children with unnecessarily complex techniques, because you can make an exhibition work from ordinary materials if you show your imagination. Here is our next work - a voluminous autumn forest on a reduced scale. The miniature trees will be depicted using dried yellow leaves that you can collect while walking in the park. Preparing material for these or any other is a responsible process, since simple drying is not suitable, the bright color will be lost, the leaves may curl and look like parchment. You need to remove moisture from them, so ironing them through a fabric with a hot iron is considered a good way. You can also put them under a press in a paper sheet, which will adsorb excess moisture and the sheet will become the texture we need. True, the second method takes longer and will be useful, perhaps, for the next season DIY “Autumn” crafts. Video To create a similar composition, you, in principle, do not need it, everything is already extremely simple. At the base of each petiole we attach a ball of plasticine and place the resulting tree on a previously prepared “edge” - a sheet of cardboard (you can use an unnecessary flat cardboard box) covered with colored paper. In this composition, both the hut, as in the example, and the plasticine forest inhabitants will look beautiful.

DIY "Golden Autumn" crafts
The main color of autumn is, of course, gold, all shades of rich, hot yellow. DIY “Golden Autumn” crafts always highlight the luxurious shades of fading nature, so they can always be distinguished at first glance from all the others.

Appliques from collected leaves will look wonderful, but you can also make a flower applique. At this time, a huge number of flowers bloom, which can be preserved in their original form by drying. This composition under glass will be an excellent decorative element in the apartment, a reminder of warm days. However, the idea of children's applique can be used not only as a wall decoration, but also for such unusual products as wall or floor ceramic tiles. For decoration, you should choose unglazed types, to the surface of which it will be easy to stick leaves. Additionally, you can coat them with a layer of primer, which will increase adhesion. You can already coat the top of the finished tile with varnish so that the leaves do not tear or fall off during use.

For children's work, you can offer the quilling technique, which is always a win-win option for exhibitions or competitions, as it looks elegant and complex, although if you know the basics it is not at all difficult. Simple figures include the golden maple leaf, which you see in the example. Since it has a complex shape, you must first transfer it to the base in the form of a sketch, and then use pins and thin rubber bands to mark the boundaries. This will make it easier for you to fill the interior space of each section with elements of different shapes.
DIY crafts "Gifts of Autumn"
Let’s not forget that September gives us not only the beauty of tree crowns, but also a rich harvest in the garden beds. Creative activities are also often devoted to this topic. DIY “Gifts of Autumn” crafts can be varied, we suggest you look at a voluminous crop braid made of fabric.

We start by cutting out the foam bases of the blanks. The easiest way to do this is with a knife, first making a ball and then forming indentations characteristic of garlic on it. It will be easier with hot peppers - the blanks simply repeat its cone-shaped shape. We will tie all the blanks using yarn and a hook, but if you don’t know how to knit, you can decorate them with fabric by making an applique. We will also need to knit the leaves of the pepper and additional elements - stems, leaves. When each vegetable is completed, we tie a thread to it, which we will weave into a braid. This craft can be presented as a housewarming gift; it will perfectly decorate the kitchen.

Natural vegetables are also suitable for crafts, most notably pumpkin, which is the star of all seasonal crafts, and not just for Halloween. In the example given, it becomes a wonderful vase for. The main difficulty in such a composition is to very carefully remove all the pulp from the pumpkin and clean it well, since otherwise it will begin to deteriorate and an unpleasant odor will appear in the room. The pillow for dried flowers will be foam, and if you want to place a freshly cut bouquet inside and want it to last longer, then lay a floral sponge, which you will fill with water as needed.

The theme of the harvest is also perfectly revealed by the ears of wheat, which make up an unusual bouquet. You can use them alone, or combine them with fall colors.
DIY autumn crafts: photos
In the majority DIY autumn crafts, photo which you will see below, conifer cones of different sizes are used for decoration. These are also precious gifts that we can get from nature if we wish to decorate our homes without spending a lot of money on it.

They can allow you to make various shapes, complex compositions and coatings. To work with this durable material, stock up on metal scissors and be careful. This material can be combined with wood, yarn or fabric, feathers, and dried leaves.

And in such a nice composition, checkers help imitate hazelnuts and look unusually impressive. As a base, you can take plastic capsules from chocolate eggs; they have the shape we need. To prevent their color from showing through the burlap, it is necessary to paint the plastic brown. When the workpiece is completely dry, it is wrapped in a small piece of burlap, its edges are secured with glue. The hat, similar to a nut cap, is made in two stages. First, you need to cut a ring of scales from a pine cone using sharp scissors. Since the cones are quite hard, it is not recommended to entrust this stage to children. Thread this ring over the burlap so that its edges are pressed by the scales. At this stage, you can also additionally secure the elements with hot glue. Now we take the very top of a large cone, it is often flat, and glue it to the top. We use small sticks to mark the branches of nuts and that’s it, the craft can be considered completed.
Autumn time gives many opportunities to realize your creative abilities. The abundance of colors on the street is especially striking in its diversity. The leaves acquire a wide variety of colors, fruits and cones ripen in gardens and forests. It is not for nothing that right now - on the eve of autumn balls, schools and matinees in kindergartens hold competitions for the best crafts made from natural materials.
The site team has prepared for you a selection of various autumn crafts made from fallen leaves, cones, twigs and other natural materials. Here you will find ideas for crafts for both children of different ages and creative adults. Perhaps you will adopt some techniques and, on a cold rainy evening, create your own unique masterpiece that will delight you and your loved ones.
Vase of twigs

Inventory
- branches of suitable diameter
- round jar
- brown paint
- glue - “liquid nails” are better
How to make a vase from twigs
Paint the base (jar) brown and leave to dry. Give the branches the required length. Apply glue to the dried jar: it is better if this is done with a glue gun. Glue the branches and leave until the glue dries completely. A vase made of branches can be supplemented with some decorative elements to suit your taste.
Leaves applique

Inventory
- paper
- PVA glue
- leaves
How to make an applique from leaves
An applique of fallen leaves is perhaps one of the most common types of autumn creativity. The main thing is that when creating a craft, you need to select leaves according to color, shape and size so that the picture looks harmonious. To create an elephant, for example, take paper and place the leaves in the desired way. Try different variations until you find the one you like. When the resulting image is final, apply glue to the leaves and attach to the paper. Wait for the glue to dry and that’s it, the craft from autumn fallen leaves is ready.
Autumn leaf wreath

Inventory
- leaves
- acorns
- branches
- thread or wire
How to make a leaf wreath
We need twigs for the base, so it is important that the branches are flexible - we will have to bend them into a circle. We fasten the branches with wire or thread, preferably brown. Then we decorate the wreath with leaves (maybe maple) and acorns, also attaching them with threads or wire. You can make a wreath of leaves like in the picture, or come up with your own version. Give free rein to your imagination.
Hedgehog made from cones

Inventory
- plasticine
- bumps
- pine needles
How to make a hedgehog from a pine cone
We take white or gray plasticine and give it the shape of an animal’s face. We attach the cones to the base. We make eyes, a nose and paws from contrasting plasticine. We attach pine needles between the scales of the cones, thereby creating a complete image of a hedgehog. A simple and beautiful craft that even very young creative people will love.
Acorn candlesticks

Inventory
- acorn caps
- candles or candle wax
- "Iris" threads
- toothpicks
- scissors
- water bath pan
How to make candle holders from acorns
First, we separate the caps from the base of the acorn. Crumble the wax and melt it in a water bath. While the wax is melting, make the wicks. To do this we will use toothpicks. Cut the thread to the required length and tie it to a toothpick. We lower the free end of the thread into our future candlestick. Pour the wax into the caps and leave to cool. When the wax hardens, cut off the toothpick and you're done. Candles will add magic and comfort to fairy tale evenings.
Dish of fallen autumn leaves

Inventory
- leaves (pictured - maple)
- balloon
- glue brush
How to make a dish from leaves
Inflate the balloon to the required size for the future dish. For convenience, we fix it in a soup plate, for example. Apply glue to the surface of the ball. We also coat the leaves with glue and attach them to the workpiece. We glue the subsequent leaves with an overlap. When the surface intended for the future dish is pasted over, we glue leaves on the base in several layers to make the dish stable and durable. When the glue dries, the ball must be carefully deflated and pulled out. We turn over a decorative vessel, which will become an excellent decoration for the interior.
Forest service made of acorns

Inventory
- acorns
- twigs
- stationery knife
How to make a tea set from acorns
We make a teapot from an acorn, gluing a spout and a handle from a twig to it. The caps of acorns make wonderful cups with handles made from thin twigs. You can use a cut of larger branches as saucers. Give free rein to your imagination, and you will get a wonderful miniature service.
Pumpkin carriage

Inventory
- pumpkin suitable in size and shape
- sharp knife
- wire
- paints
- elements for decoration
How to make a pumpkin carriage
Before cutting holes in the pumpkin, think through the details, or better yet, sketch out a sketch so that you can clearly imagine all the details of the future carriage. After cutting out the base, you need to make the wheels. We make them from wire and attach the axles with glue or wire. In the future, we decorate the carriage as your imagination tells you, you can paint it and decorate it with a design. You can also use various beads, ribbons, in general, whatever you like.
Picture of leaves and dried flowers

Inventory
- dry leaves and flowers
- paper
- paints
- tassels
How to make a picture from dried flowers and leaves
On a sheet of the format you need, use paints to create a background. When the base dries, we glue the existing flowers and leaves to it, having previously thought through the composition. Thanks to your imagination, you can create a unique landscape that will delight you and those around you, reminding you of summer.
Chestnut caterpillar

Inventory
- chestnut nuts
- plasticine
- matches
How to make a caterpillar from chestnuts and plasticine
We take several nuts and fasten them together with multi-colored plasticine balls. We make eyes, nose and mouth. Using matches or toothpicks we make horns. The cheerful and wonderful caterpillar is ready. This craft can become a real hobby for children of kindergarten age. Making a caterpillar is very simple and quick, which is important: kids are often restless. And the result will please not only children, but also their loving parents.
Now you do too crafts on the theme “Gifts of Autumn” for school or kindergarten? After all, soon competitions and exhibitions of crafts made from natural materials (branches, cones, leaves, straws, shells, pebbles, vegetables and fruits) will begin in schools and kindergartens. Many parents immediately have a question about what they could do with their own hands that would be so beautiful and original. Look at the photos sent by our readers in 2019, get ideas and come up with something of your own. Send photos of your autumn crafts made from nature materials, vegetables and fruits (), and we will be happy to publish all the new items. A big request to all participants of the competition: do not send copies of works already available here. Hedgehogs made from seeds, deer made from cones, caterpillars made from apples and other crafts that are repeated from year to year are no longer accepted! Send your new and original crafts, show your imagination!
New crafts “Gifts of Autumn - 2019”
Are there any little entertainers in your family? Then you are familiar with their constant desire to invent, make, create something. For such dreamers, various activities with plasticine bring great pleasure. And if you try to combine plastic materials with natural ones, you can get extraordinary crafts.
“Small bird” made of almonds and plasticine
Try to make a small bird of unprecedented beauty from almonds and plasticine - and you will be surprised how simple things turn into miracles in your hands! Master class by Anastasia Batina.
For creativity, prepare:
- almond;
wet wipes; - plasticine;
- simulation stacks;
- plastic board.
We create a magical little bird from plasticine and almonds
Select large, unopened almonds. Wipe with a damp cloth to remove dust and degrease the surface.
Roll two black balls of the same size. Press down with your finger and press it to the bird's head. Add small white spots at the corners of the eyes.
Make a triangular beak from red plasticine and use a stack to divide the tip into two parts. Stick the beak to the nut.
Make a small yellow plate in the shape of a semicircle and place it on top of the beak. Make nostrils with a sharp stick or toothpick.
 Take bright green plasticine and mold two wings in the shape of a “leaf”. Roll four thin yellow flagella and stick two on each wing.
At the base of the wings, stick flat round yellow decorative elements. Make small indentations with a round stack and add red spots inside. Using a sharp stick, squeeze out holes on the feathers, as in the picture.
Connect the wings to the body of the bird.
 Roll red, yellow and green flagella of different lengths.
 Stick on the tail feathers, alternating the colors of the plasticine blanks.
 Make a small tuft of any shape from red plasticine. Connect the part to the base of the figure.
Make short legs in brown or red. Stick the limbs to the nut.
 A wonderful little bird made from natural materials and plasticine is ready!

What a tiny bright bird we have. It’s as if she came to us from the pages of fairy-tale books, or maybe even from someone’s magical dreams! Such a small bird will complement the festive composition and turn into a decoration for a flower in a pot, a Christmas tree or a wreath.
"Dragonfly and Ant". Kulikov Kirill Andreevich.
The work is made from natural materials (cones, leaves, acorns, branches, bark). Also used: a candy box, acrylic paints and hot glue.


"Autumn Umbrella". Zyulyaeva Ulyana.
The umbrella is made of cardboard, decorated with flowers from maple leaves, pine cones, rowan berries, dead wood, and spruce branches.

"Autumn Enchantress." Garkushin Nikita.
They took the doll and covered it with dry autumn leaves; other natural materials were also used: cones, acorns, nuts, etc.


"House in the Forest" Polyakov Elizar.
The work required moss from the forest, pebbles, spruce branches, pumpkin, thuja branches, rose hips, physalis shell, sticks for the wedge, twine, a cone from a climbing plant in the garden for the Hedgehog. Glue gun.


"In the autumn forest." Dyatlov Dmitry.
Glue tree bark and twigs onto a colored background. We draw the silhouette of an owl and put seeds inside it. We make owl wings from leaves. The eyes are made of dry blades of grass, the pupil is a plum pit. Now we glue the dried leaves of autumn rowan. They will beautifully complement the appliqué.

Pig, eagle owl, fish and mermaid made of pine cones and plasticine - step by step


"A difficult bouquet." Solodovnik Anya Valerievna.
The bouquet was made by the head of the circle of the Poltava city center of out-of-school education, Solodovnik. A flowerpot is made from paper tubes. Flowers made from cones painted with acrylic paint. Autumn leaves and berries. This is what happened.


"Autumn Bouquet". Elena Batrakova.
A bouquet of maple leaves, roses (made from), hawthorn, quince, physalis, hydrangea, spruce branches.


"Wreath". Groshev Andrey.
Mother - Grosheva Anastasia Vladimirovna.
The work is made from tree branches, rowan berries, and bush hearths.

"Turkey". Grachev Vyacheslav.
The work is made from pumpkins and leaves.

"Autumn Mr. Kolobok." Kozlova Maria 3.5 years old.
The work is made from a pumpkin, the nose is from a carrot, the hair is from grass picked from a flower bed. The hat is made from newspaper tubes. The eyes are blueberries.


"Autumn Beauty" Iskhakova Angelina.
The work is made of flowers.

"We travel as a family." Nelyubina Darina.
Eggplant, onions, carrots, matches, plasticine.

"Magical forest". Berseneva Ulyana.
When performing the work, moss, lingonberry sprouts, and plasticine were used.

"Ladybug in daisies." Garkushin Nikita.
We painted a pebble from the Black Sea coast with acrylic paints. At the end of the work, the product was coated with varnish. The result is such a funny ladybug.

"Wreath of pine cones." Kallaeva Elena.
Cones, gouache, glue, cardboard.

An original craft made from a material unusual for our latitudes - “A house made of coconut and its inhabitant.” Kallaeva Anna.
Coconut shell, plasticine, grass, pine cones, acorn cap.


"Grandfather forester." Kirsanova Taisiya.
The work is made of wood, ears of corn, burlap, beaded material, dry leaves, and wrapping paper.

"Baba Yaga". Sorkina Lydia.
The work is made of natural material: the body is made of a fir cone, the arms and legs are made of birch branches, the paws and handles are wrapped in jute twine. Also used were alder cone, viburnum berries, and beads for the eyes.

"Owl". Trushina Lydia.
The owl's body is made of paper and covered with corn hairs (snouts). The paws and eyebrows are made of maple wings, the nose is made of an acorn. The eyes are glued onto calendula flowers. Everything is glued with PVA glue.

"Small Motherland" Tsareva Angelina, 7th grade.
This work was made from natural materials for a school competition.

"Family of owls." Cheldrikova Ekaterina.
The work was made using wooden hemp, cones, rowan berries and viburnum.

"Magic Castle" Razumkova Sofia.
The castle is made of tree bark, decorated with pieces of moss and dry leaves. Various natural materials were used in the craft: cones, twigs, dead wood, chestnuts. Prince and princess figurines are sewn from pieces of fabric.


"Mishkin's estate." Sayfutdinova Renata Azamatovna.
Made from natural materials: cones, spruce and birch branches, leaves, rowan berries, wooden blocks for hives. Bees are made of clay. Bear, Masha and others are taken from Kinder Surprise.


"Magic House". Ignatiev Vladislav.
Pumpkin, paints, potatoes, onions, plasticine.


"Cinderella on the way to the ball." Ikonnikova Essenia.
From vegetables with the addition of pumpkin seeds, paints.

"Firebird". Riyazutdinova Larisa Semenovna.
The work is made from ash seeds.
"A whale swimming on the waves." Dmitriev Timofey.
Vegetables used in the work: cabbage, zucchini.

"Happy Rat" Klochkova Sasha.
The work is made of zucchini, the nose, ears, paws and tail are made of carrots, the eyes and teeth are cut out of white cardboard. Antennae made from fishing line were inserted into the nose.

“Pumpkin tree”, “Pumpkin flowers”. Samoilov Valery.
The work is made from pumpkin seeds, the seeds are painted with gouache.

"Aunt Owl." Zhalskikh Anastasia.
The work is made of autumn leaves, acorns, and cones. Decorated with fabric and satin ribbons.

"Owl". Koven Svetlana.
The work is made from leaves, cones and waste material.

"Forest Master" Kovtorov Ivan.
Cones, dried leaves, plasticine, acorns.

"Hedgehog in the autumn forest." Moskvin Roman.
Cones, leaves, plasticine.

"Autumn Hedgehog" Group "Romashka".
The work is made of autumn leaves.

“Hedgehog in the fog (Ekaterinburg).” Zvereva Christina.
For work you needed:
- plasticine,
- a ball from a dry pool,
- coffee beans,
- grass, autumn leaves,
- paints,
- glue.

Hedgehog, bear, hare and crocodile made of shells and plasticine - .


"Pointe". Kalycheva Victoria.
The work is made of cucumber. Decorated with satin ribbon and sequins.

"The sparrows are singing." Flegontova Kira.
The work is made from dry leaves.

"Swans". Kushnirenko Victoria Nikolaevna, 10 years old.
Cones, autumn flowers, bird feathers, fir branches and plasticine were used to complete the craft. The body of swans is made of cones painted white, and the wings and tail are made of feathers. Swans swim on a plasticine “lake”. The craft made from natural materials turned out to be bright and colorful. 
"In an autumn meadow." Chernoyarova Valentina Aleksandrovna, 10 years old.
When performing the craft, pine cones, chestnuts, acorns, lentils (eyes), autumn leaves, and plasticine were used. These natural materials were used to create funny forest creatures that we met in the clearing. 
"Bunny". Chernoyarova Natalya Aleksandrovna, 10 years old.
The craft is made from natural materials - it all grows in our dacha. The main character, the bunny, is made of cabbage (the body), the ears and paws are made of zucchini, and the whole composition is complemented by viburnum berries, autumn leaves, an inflorescence and an ear of corn. Such a colorful and bright craft will decorate the “Autumn Festival!”  "Gold fish". Prysich Anna, 6 years old.
The fish template is printed. The head is decorated with a felt-tip pen, the tail and body are made of autumn leaves. Algae from a Christmas tree.
Make a wish. 
"Autumn outfit." Yakupova Elina.
This applique is made of leaves and rowan.  "Lady Autumn" Sorokin Artyom.
Applique of dry autumn leaves.

"Autumn time". Renzhina Victoria.

"Autumn Bouquet". Averkin Alexander.
The work is made from dried leaves and flowers.

"Breath of Autumn" Pinaeva Anna.
The work is made from dried leaves and flowers.

"Magic autumn landscape." Nadezhda Viktorovna Topolnikova.
The work measures 25x17 cm. The base is a candy box. The background is made of plasticine in red, orange and brown colors. tree - made from branches and acorn caps. The mushrooms are also made from acorn caps and sculpted from plasticine by my son.

"Autumn Courtyard" Nerusheva Anastasia Mashoshina Anya.
The work is modeled from cardboard, paper, glue. Decorated with natural materials - maple leaves, seeds, twigs. Apples, buckwheat and beans were used.

"Autumn Fantasy" Vdovina Daria.
Made from natural material. 
"Hedgehog made from natural material." Polyakov Gleb 5 years old and Georgy 3.5 years old.
A hedgehog was drawn on a piece of paper. They made a base with plasticine and the children stuck sunflower seeds into it. Then the paws were made from cotton swabs and PVA glue, and the belly was made from dyed millet. The legs were made using PVA glue and buckwheat. Dry leaves were crushed and sprinkled on glue, thus creating a clearing. An apple, leaves, and an acorn from Fix Price were glued onto the finished hedgehog. 


"Autumn forest". Voronin Stepan.
Dried leaves, felt. 
"Sovunya." Collective work of the middle group “Daisy”.
We picked up cardboard,
The outline was cut into it,
Outline of Owl - owls,
Wise bird of the whole Earth.
Quick glue - gun
We glued the outfit;
Variegated leaves all around
They sparkled like fire.
A bow was attached to the neck,
We took plasticine in our hands,
They made her glasses
Let them be for Wisdom.
Next are the cheeks
Sharp beak.
And Sovunya is just great!
A treat for all of us!

"Autumn picture." Dobrynin Danil.
Rowan, leaves.

"Lion cub." Sibgatullin Daniyar.
Drawing of a lion cub, leaves, glue.

"Autumn in the forest." Gleb Timokhin.
The base is penoplex. Covered with leaves and a tree branch. All the animals are made from chestnuts and acorns. Owls made of cones.


"Kolobok" Nikolenko Maxim, 5 years old.
MDOBU d/s 48 “Kapitoshka” r.p. Chunsky
The work is made of natural materials: pumpkin and pine branches. 
"Merry vegetable garden" Vitalya Emoldinov, 5 years old.
MDOBU d/s No. 48 “Kapitoshka” r.p. Chunsky
The work is made of natural material: moss and vegetables: beets, potatoes, onions, peppers, tomatoes.

“Even if you go halfway around the world, you won’t find a healthier cake.” Kulik Vitaly.
The five-tier cake is made from fresh vegetables, berries and herbs. The base of the tiers is made of pumpkin, zucchini, squash, eggplant, and bell pepper. The decoration is carrots in the shape of a spiral and the base for a water lily, tomatoes, parsley, beans, onions in the shape of a water lily, raspberries, bell peppers and hot capsicum. The fastening is made with wooden sticks and skewers. The cake can take center stage on the exhibition table, and children will look at it with interest and think about when they can eat it :)

"Apple Caterpillar" Kozlova Maria, 3.5 years old.
For the work you needed: apples, toothpicks for joining, hawthorn fruits, chokeberry fruits, carrot tops, plasticine.


Kandaeva Natalya Viktorovna, Moscow.
This craft is made with love for autumn. They will remind us of the passing autumn for a long time.


“A small bird in the forest in autumn.” Artyom Malyshev, 10 years old, Serpukhov - 15, Kurilovskaya Gymnasium Municipal Educational Institution.
To make this autumn craft I needed: Christmas tree branches, autumn leaves, bark, moss, fir cone, acorns, chestnuts, bird feathers and plasticine.
It’s nice to take a walk in such an autumn forest, breathe in the forest air and admire the nature that the golden Autumn gave us!

What do you use for fall crafts?
Poll Options are limited because JavaScript is disabled in your browser.
Crafts “Gifts of Autumn”, photos by category
There are crafts of varying degrees of complexity that are suitable for both junior, senior or preparatory groups in kindergarten, and for school. Last time we sorted the works by materials: “ “, “ “, “ “. This time, for your convenience, we have divided all the submitted photographs of crafts made from various natural materials into thematic sections.
Choose a topic and look at the pictures:
Houses
"Cheerful old ladies." Razumkova Sonya with her mother Nadezhda.
The entire craft is made entirely of natural materials: moss, bark and tree branches; figurines of grandmothers: walnuts and cones; background: leaves of various trees - all autumn gifts.


"House in the village". Shitova Sonya.
Wood, birch bark, matches, forest moss, pine cones, hay, painted maple leaves, river pebbles for decoration.
The craft aroused admiration among kindergarten teachers and parents.


"Forest clearing". Balayan Masha.
The work uses twigs and cones - gifts of golden autumn.

"Grandma Yaga's Hut" Krasnov Yura, Krasnova N.O.
The walls of the hut and the steps are made of corn stalks. The basis of the roof is cardboard, on which bean pods, spruce branches and an eggplant pipe are attached. A maple branch acts as a “chicken leg”. The well and buckets are made of beans and sunflower seeds. Baba Yaga's head is made of potatoes, her body is made of an ear of corn, her arms and broom are made of twigs. The stupa is made from zucchini. The composition is fixed on a birch cut, decorated with autumn leaves. The gifts of nature made it possible to create such a craft with your own hands!


"On forest paths." Perestoronin Yuri.
The donkey Iashka delivers the gifts of autumn throughout the forest. Potatoes, garlic, rowan, pumpkin, moss, pine cones, peppers, apples - generous gifts of autumn!

"Forest House" Chumakova Alena.
The base of the house is made of cardboard. We used bark, moss, cones, wood cuts, mirror chips, juniper twigs - the bountiful gifts of autumn. This is such a beautiful craft.


"House of Caterpillars" Zelepukhin Daniil.
The house is made of pumpkin, the caterpillars are made of chestnuts, and the hedgehog is made of seeds.

"Gifts of Autumn" Baeva Anastasia.
Wood, leaves, cones, acorn, chestnut, flowers, cardboard, plasticine, glue, colored paper, viburnum berries, spruce, peas, buckwheat, bird feathers, foil.


"Gifts of Autumn" Moskvin Roman.
The craft is made from pine cones, dry leaves, pebbles and dry twigs.

"The Gnome's House" Kirill Radostev.
A zucchini house decorated with plasticine.


"Dreamland". Steshina Polina.
To make the craft, the following materials were used: moss, nuts, flowers, fabric, branches, base. .

"Spider's House" Esipova Polina.
The house is made of a pumpkin, the spider is made of a bulb, the landscape is made of moss, beans, and dry leaves.

"Birdhouse". Stepanova Anastasia.
Our craft consists of red and white beans, castor bean seeds, a broom and rope.


"Baba Yaga's Hut" Lavrentieva Polina.
“Baba Yaga’s Hut” is made of aspen branches, pine cones, hemp, plasticine, and threads.
"Forest House" Makhanov Semyon.
Acorns, leaves, wild grapes, blackberries, chestnuts.

"House in the village". Varyanitsyna Ksenia.
The house is made from: beans, peas, straw, buckwheat and wheat groats. The roof is made of pine cones, the fence is made of willow. The base is strewn with semolina. The wheelbarrow is made of chestnut and felt pumpkin. The well is made of beans, branches and a cardboard bucket with foil.


"Teremok". Bekbulatova Anya.
The work is made from the “gifts of autumn” - vegetables, autumn leaves, pine cones, berries.
"Collecting gifts of autumn in the village." Ulyanets Kira.
The clearing is covered with real moss from the forest, with Christmas tree cones and dried flowers around the perimeter. In the center is a house covered with pistachios. The house has a real door made of mini planks. The roof of the house is covered with dried flowers. Grandfather and grandmother have heads made of potatoes, their bodies are pine cones. In the center is a real pumpkin from my garden. The well is covered with real round boards. In the pen there are animals made from acorns and nuts.


"House in the Forest" Manakov Ilya Sergeevich.
Materials: spruce and pine cones, rowan berries, linden blossom, peach and cherry beans, pine needles, stones, dried rowan leaves, birch and aspen leaves, shell, matches, cardboard. The child collected all the materials in the forest, helped glue the parts, sculpted a snail, laid out leaves and other materials. Made under the guidance of my mother.

"Uncle's House AU" Kozlov Vladislav Viktorovich.
The craft “Uncle AU House” is made from materials that include: linen fabric, maple branches, wool thread, pine nuts, bamboo sticks, paper, lilac branches.

“Who, who lives in the house?” Gryaznov Artyom.
Material: foam, trimmed with twigs. The roof is made of reeds. The staircase is made of twigs. For stability, the hut is attached to a tree branch and placed in a flower pot.


Owls
"Forest Guardian" Nikolaev Daniil.
The eagle owl is made of willow and rowan leaves. They are glued to cardboard on both sides. The eyes, nose and paws are made of plasticine.
The bowl is made of acorn caps glued together with hot glue. The bowl is filled with viburnum berries.


"Owl." Eliseev Narotam.
Pine cone, pumpkin seeds, melon seeds.


"Owls." Chumakova Alena.
The owl is made from pumpkin seeds, pine cones, twigs, feathers, juniper. Also bark and moss.


“Owls are beauties.” Kovalev Alexander.
Used: branches, dried leaves, rowan, wood cut, cardboard.

Ryabukhina Alina.
Owl-Owl, spruce and cones from a branch.

"Autumn owl". Kryazheva Ekaterina Nikolaevna.
Autumn eagle owl, made from tree seeds, so-called “airplanes”. The frame is a plastic bottle covered with padding polyester, into which the “airplane feathers” were stuck.

"Three little owlets." Strutskaya Valentina.
Birch stumps, cones, moss.

"Owl". Turbylev Nikita, 5 years old.
The owl is made of pine cones.

"The Owl Kingdom". Ryazanova Ekaterina.
The owls are made of pine cones; eyes, beak, legs are made of plasticine. A hedgehog is walking under a tree.
Hedgehogs
“Craft made from natural material “Hedgehog”. Gordeev Denis.
The frame of the Hedgehog is carved from hardened foam, pine cones on top, and the nose is made of cork.

"Northern Hedgehog" Skripnikov Igor Alekseevich.
My Northern Hedgehog is made from pine cones and hot glued to foam.
"Forest hedgehog" Kandakov Leonid.
The work is made of cones, acorns, leaves, plasticine, plastic bottles, grass.

"Hedgehog". Tokar Alisa.
The hedgehog is made of paper, seeds, and viburnum.

"Hedgehog". Timofeev Alexander Nikolaevich.
Radish, cones, gifts of autumn.
"Hedgehog Fufik." Malofeeva Alena.
The craft is made from a plastic bottle and pine cones. In addition, decorative apples, rowan berries, and tree leaves were used.

"Charming hedgehog." Zhogin Nikita, 4th grade, school No. 155. Novosibirsk city.
The hedgehog is made of a sponge (wet), aster flowers, the head is made of a pumpkin, the eyes are made of peppercorns. You can use any blades of grass and leaves. Tomato on “needles”.

"Hedgehog". Sumenkova Valeria.
Cones. Barberry. Thorns. Heather. Spikelets. Cowberry. Leaves. Rowan. Plasticine.

"Family of Hedgehogs" Malyshev Arseniy 3 years old and Malysheva’s mother Elena.
This is the Hedgehog Family! There are 7 of them, that is, the 7th!
Hedgehogs are made of different materials: the bodies of hedgehogs are plasticine and modeling dough, and almost all of them have different needles - one of the leaves,
the second from pine needles, the third from birch sticks, the fourth from pine cones, and three from watermelon seeds. Leaves, moss, sticks, tree bark, rowan berries, hawthorn and mushrooms - everything is real, natural!


"Hedgehog". Ochneva Victoria.
The work is made from salt dough using natural materials: cones, rowan berries, leaves and moss.

"The Yezhov Family". Shirnina Evgenia Nikolaevna.
Cones, papier-mâché.

"Forest hedgehog" Permyakova Anastasia Antonovna.
The work is made of cones, rowan, and tree leaves.

"Tsvetik the Hedgehog." Nikolyuk Lisa.
September flowers, leaves, viburnum.

"Autumn Pantry" Minin Alexander Sergeevich.
The work was done for a kindergarten on the theme: “Autumn Pantry.” They made it from thorns from a bush, as well as plasticine, leaves, PVA glue, a glue gun, a 0.5 liter plastic bottle, a pine cone for decoration, and colored paper.

"Protect the environment.". Novikov Daniil and Novikov Vadim.
The work is made of cones, seeds, spruce branches, autumn leaves and plasticine/

"Hedgehogs in the forest." Elizaveta Petrenko.
Cones, plasticine, spruce needles, potatoes, leaves.
"Autumn Fantasy" Baev Kirill and mother.
Hedgehogs are made from potatoes, black rowan, toothpicks and plasticine. The clearing is decorated with leaves, moss and rice, as well as apples and wild rose hips.

"Funny hedgehogs." Filippova Sophia.
Pear, grapes, vegetation.

"Hedgehogs." Reshetnikov Nikita.
Potatoes, cones, pine needles.

Characters
"A good fairy tale." Lyulikov Georgy.
Baba Yaga and Leshy are made of sticks, the stupa is made of a jar, covered with branches.


"Minion is a pumpkin." Grebennikov Borya.
Pumpkin, plasticine.

"Moose." Ordova Alisa.
Pumpkin, twigs.

"Grandma the Hedgehog." Orlov Stepa, 3 years old.
The work is made from two cones, hair from threads, a stupa - a jar of yogurt covered with threads. The broom and hands are made of twigs. Eyes made of plasticine, beads made of rowan.

"IA's birthday." Guskova Elizaveta.
Donkey: potatoes, eggplant, plasticine; owl: eggplant, buttons, beans; lake: mirror, birch leaves, roses.

"Turtle Tortilla" Collective work of the "Daisies" group.
The craft is made from pumpkin and potatoes. Some details (eyes, mouth, shell elements) are made of plasticine. The hat is made of an openwork napkin, the glasses are made of soft wire. What a beauty it turned out to be!

"Crocodile Gena and Cheburashka." Polyakov Elizar.
Crocodile Gena is made of zucchini, carrots. Eyes are made of chicken protein and black pepper.
Cheburashka is made of white eggplants, eyes are made of cloves, a hat is made of an acorn cap, stands on a squash.


"Smeshariki in the forest." Surovtsev Anton.
The work is made of plasticine, pear, apple, nuts, cedar, garlic, onion, potato, mushroom, leaves, rowan.

"Sovunya." Romadova Victoria.
The sovunya is made of pumpkin and decorated with felt details; for the beauty and completeness of the work, moss, cones and rowan berries were used.

"Fabulous Autumn at the edge of the forest." Khaliullin Kamil Adelevich.
Plastic, wood, toys, plasticine, gouache, lemonade bottle, glue, tree branches, viburnum, chokeberry, squash, sunflower, rose hips, wildflowers.

"Here I am". Isaeva Ekaterina Olegovna.
Zucchini.

"Minion". Trofimova Polina 5 years old. Cherepanova Anastasia 13 years old.
For our craft, we chose the ripest yellow zucchini. They painted it with gouache, made hair from toothpicks, and eyes from corks. Everything is simple and very beautiful!!!


"Minions". Rybin Artem.
Material: Boiled corn and plasticine.

"Gold fish". Lebedev Matvey.
The product is made of leaves, and nut shells are attached to the salted dough. And the crown is made of a cone.

"Lesovichok" Kuchumov Artyom.
The craft is made from natural materials: pine log (torso), branches (arms and legs), moss (hair and beard), chaga - birch mushroom (feet), spruce branches (headdress), stand - birch cut + moss and twigs ; eyes are lemonade lids.

"Autumn Fairy" Vasilisa.
Fairy or queen of autumn.
The doll is dressed in a dress made of autumn leaves. Also used in the work are ash earrings, rowan and raffia - all natural materials.
Vasilisa spent 7 years gluing everything herself, her mother only helped with the head.

"Crown of the Autumn Queen." Kozlova Victoria Viktorovna.
The “Crown of the Autumn Queen” craft is made from natural materials, which include: maple branches, poplar branches, lilac branches, maple seeds, wool thread, pine nuts.

“Mom and Dad Kartoshkin on an autumn walk.” Trofimov Vova and Polina.
Our crafts are made from very interesting, unusual potatoes. We dressed them up for an autumn walk and came up with umbrellas in case it rained.


"On a visit to Cheburashka." Ivanova Daria.
Made from vegetables (zucchini, cucumbers, potatoes, tomatoes, carrots), plastic, moss, flowers, plasticine.

"Heavenly Creature" Kosyanenko Matvey.
The work is made of pumpkin.

"Fairytale friend of Autumn." Arkhipova Victoria Yurievna.
This work was completed by a 7-year-old girl, Vika, together with her parents. The work is very colorful, bright, and most importantly - autumn... Our friend (let's call him Mr. Pumpkin) came to visit us from a fairytale forest. Made from gourd (this is its base), the arms and legs are made from fabric. On our friend’s head is a straw hat decorated with rowan berries. Our Mister is sitting on a birch stump (the flower pot was turned into a stump), in the middle of a green lawn, strewn with rowan berries and apples. Wonderful work that used the “gifts of autumn”!

Vegetable animals
"Wonder Bird" Timofeeva Ulyana, 9 years old.
The work is made of pumpkin and squash. The bird is decorated with calendula flowers.

"Autumn Glade". Popova Yulia Evgenievna.
Made from pumpkin, spider from potatoes, caterpillar from apples and carrots.


"Kittens." Perestoronina Arina.
Pumpkin, turnip, rowan, pepper, apples.

“Hedgehogs are preparing for winter.” Atanov Ivan.
The work is made of sweet peppers, twigs of cloves, leaves, chestnuts, flowers, rose hips and decorative ornaments.

"Smiley Bunny." Moskalev Platon, Municipal Budgetary Educational Institution “Secondary School No. 21 named after. N.I. Rylenkova", the city of Smolensk.
the work is made from vegetables (cabbage, zucchini, carrots), fruits (apples), flowers (asters).

Ena Nikolay. "Bunny"
Made from cabbage.

"Mother hen." Volkova Lyudmila.
The work is made of pumpkin, zucchini, and maple leaves. 
"Glamourous snail" Grigorenko Daria.
The snail's house is made of pumpkin, the head and neck are made of zucchini, the horns are made of rowan berries. The work is decorated with rhinestones and other decorative elements.

“Who, who lives in the little house?” Berezanov Daniil.
The tower is made of pumpkin, decorated with oak-shaped rowan, red pepper and leaves. The animals are made from onions, potatoes and apples + plasticine. Under the tower there are leaves, spruce branches and flowers.

“What a company...” Tsintserova Alena Gennadievna.
Zucchini, straw, chicken fluff, bird cherry.

"Cheerful Penguin" Lityago Elena.
Pumpkin, potatoes, bell pepper.

“Pigs from Tayushka!” Apacheva Taisiya.
We used cardboard, leaves, branches, rowan berries, potatoes, hops, plasticine and a lot of good mood!)

"Mischievous insects" Falkin Ivan.
Pumpkin house. A caterpillar made of acorns and a spider made of chestnuts. Cobweb - threads.

"Caterpillar". Volodichev Ilya.
Made from apples and chokeberry berries.

"Little Pig." Andriychuk Daria.
From vegetables and fruits.

Transport
"Race car" Klochkov Alexander, 6 years old.
The car was made from zucchini and tomatoes. The parts of the car are made of paper. The person in the car is made of plasticine.

"Sail". Belyaeva Ulyana with her mother.
The work is made of reeds, dry maple leaf, corrugated cardboard, sticks and glue.

"Boat of Knowledge" Soloviev Alexey.
The “Boat of Knowledge” craft is made from zucchini, carrots, cabbage, thread, sticks, and plasticine.


"Into the sky". Marchenko Kirill.
Airplane made from natural material.

"Zucchini Engine" Lonsky Artyom.
The work is made from zucchini with the addition of small details.

"For the harvest." Sirotkin Artem Vyacheslavovich, 4 years old.
The work is made of vegetables: the car is made of potatoes, carrots, the girl sitting in the car is made of vegetables and waste material.

"Machine". Galkin Mikhail.
The car is made of eggplant, the work is decorated with rowan berries, and next to the car is a caterpillar made of tomatoes.

"Roma in a stroller." Strizhova Polina.
The work is made from delicious gifts of autumn)))


"Ship of Autumn" Vanya Chernykh.
The craft is made of pumpkin and paper. Figures of heroes from Kinder Surprise.
"Car". Maksimov Dmitry.
The work is made from zucchini, the man is made from carrots, onions and tomatoes.

"Forest Harvest" Linkov Yuri.
The craft is made of wood, pine cones and acorns.

Compositions and still lifes from natural materials
"Autumn Harvest" Lika.
The basket is made from natural materials with the addition of decorative elements. The basket is made of pine cones. Filling: apples, rowan, chokeberry, moss litter, added pine cones and chestnuts.

"Rainbow Childhood" Osipova O.I. Konovalova O.S.
Flowers.

"Cute Chicken" Lekgova Sophia.
Pumpkin seeds, decorative decorations.

"Swans made of cones." Garkushin Nikita.
The work is made from pine cones, cardboard, chenille wire and feathers.

"Magic Wand of the Forest" Petrov Dmitry.
Topiary is made of pine cones and autumn flowers.


"Autumn is coming." Solovyova Ksyusha.
Natural materials.


"Autumn Bouquet". Solovyova Svetlana.
Zucchini, peppers, grapes, leaves, toothpicks.


"In a hot air balloon in autumn." Timofeev Andrey Nikolaevich.
Made from natural materials: pumpkin, acorns, apples, rowan, leaves.

"Gifts of Autumn" Ogurtsova Irina. 


"Hello, school!" Trushina Lydia.
Cones, acorns, acorn caps, nuts, peas, physalis, leaves, thuja branches, spikelets, orange peel roses, various berries and seeds.

"Autumn Umbrella". Ivashechkina Yana and mother Lena.
Umbrella: cardboard, flat wire, twine;
Bouquet: leaves of small shrubs, fir cones, barabaris fruits, snowberry fruits, thuja twigs;
Roses: maple leaves;
Hot glue, threads.

"Bird and Flowers" Tugarinova Yana.
Flowers from pine cones, birds from leaves.

"Wind Catcher" Egorova Ksenia.
We were inspired to create “Wind Catcher” by the bright colors of autumn and colorful autumn leaves, which easily succumb to every breath of wind, tremble on tree branches, break off and, spinning in the air flow, fall smoothly or in a whirlwind to the ground. We used thin oak branches as a base, twisted them into a ring and secured them with threads, then tied them a little with oak leaves, chestnuts, acorns, berries, bladderworts, rose hips and sugared pears, and at the very top, in front of the fastening loop, we threaded thread through a small green apple. The pendants consist of birch and maple leaves, they are secured with transparent fishing line to create the effect of weightlessness.

"Autumn Mushrooms" Gameevs Yulia and Alexandra.
Wooden saw cuts of different diameters, dried cones, leaves and blades of grass.
Additionally: paints, plastic eyes.


"Autumn tree." Safonova Svetlana Alexandrovna.
To create this beautiful tree we needed:
1. Planter (can be a pot)
2.Gypsum
3.Newspapers
4.Making tape
5.Strong rope
6.Strong stick
7. Natural buds
8. Spruce needles
9. Rowan branches
10.Wolf white berries
11.Fallen leaves
Cooking steps:
We crumple the newspaper and give it the shape of a ball. Then, so that the ball holds its shape, we wrap it with masking tape (for a more durable job, I wrapped it with rope). Now we need to attach a branch to our ball. To do this, cut a small hole in the ball, 2-3 cm deep, coat the twig with glue and insert it. When the glue dries, we begin to glue the ball. We will glue the cones first (they must be well dried, because if the cones are damp, they will not stick). Then we will glue the leaves. Next you can glue rowan branches, spruce branches, wolf berries and any other decorations that fit our autumn theme. Then we prepare the solution in unnecessary containers and pour it into a flowerpot with a tree. In order for the solution to dry, you need to wait about two hours. After we have made sure that the solution has hardened, we proceed to decorating the flowerpots. We cover the surface of the solution with spruce branches, cones and anything else. So our bright tree is ready!

"Forest Beauty" Serova Natalia.
The work is made from a Barbie doll; her dress and train are decorated with maple leaves and decorated with flowers.

"Proud deer." Gavva Ekaterina.
The work is made from cones, acorns and walnut shells. All parts are fastened with plasticine. The legs are made of toothpicks. Antlers are thin branches.

"Berry Falls" Levin Stepan Vasilievich.
The work is made from natural materials. It contains:
1.raspberries
2.barberry berries
3. chokeberry berries
4.rose hips
5. Rowan berries
6.cherry berries
7.Oakleaf rowan berries
8.thuja cone
9. currant leaves
10. Rowan leaves
11.barberry leaves
12. chokeberry leaves
13.birch leaves
14.walnut leaves
15.oak leaves
16.cherry leaves
17.rose hips
18. branch of mountain ash
19.maiden grape leaves
20.sumac leaves
21.linden leaves
22.leaf of rowan oakleaf
23.grape vine
At the top is a decorative dragonfly. Golden, like autumn itself.

"A bountiful harvest". Kulik Vitaly. (7 years).
The horse is made of straw and grass, the eyes are made of chokeberry, and the crown contains a flower made of rowan berries. The cart and harness are made of birch branches, and the crops in the cart are real miniature vegetables and berries that were grown by the author of the craft.


Rusina Victoria. "Forest Bowl"
MA preschool educational institution » Kozlovsky CRR - kindergarten “Bee”, Chuvash Republic, Kozlovka.
Head: Tsirulina Ekaterina Vitalievna.

"Ostrich". Kallaeva Anna.
Cones, plasticine, stick, ash seeds.
Ostrich girl with a flower at her feet.

"The goblin collects mushrooms." Kallaeva Lyubov.
The goblin is gathering supplies for the winter and comes across a very beautiful fly agaric.
Pine cone, shell, acorn caps, ash seeds, plasticine.

"Duck with ducklings for a walk." Chmylikov Matvey Alexandrovich.
Duck material: Salt dough and feathers.
Pond material: Painted sawdust.
For decoration around the pond: rowan, immortelle, flowers and reeds made of polystyrene foam and colored paper.

“Bugs and spiders in an autumn meadow!” Maria.
Pumpkin, tomatoes, onions, grapes, viburnum, autumn leaves. We cut out a window in the pumpkin and another hole for the web. I made an umbrella from the cut off top of a pumpkin.


"Star of the East" Golubeva Alena.
Apple, rose, birch branch, spruce branch, berries.

"Autumn forest". Malova Sofya Maksimovna.
The work is made from natural materials, the toys are from Kindersurprise.

"Forest gifts". Evdoshenko Denis.

"Harvest from Alina." Zaryankova Alina Stanislavovna 5 years old.
The work is made of natural materials: leaves, cones, vegetables, seeds.

"Tricks of Autumn" Akolzina Victoria.
This topiary is made from cones, rose hips, rowan and birch leaves. Also decorated with a decorative bird.

"Autumn mood". Ivanov Artyom.
The mushroom stem is daikon, the cap is tomato, the dots are mayonnaise.

"Autumn Decor". Makeev Nikita Sergeevich 2 years 2 months, mother Elena.
Russula, pigweed, moss, rowan, chestnut leaves, birch, American maple, larch, pine needles, viburnum, acorns, beets, cones.

"Autumn Fishing" Odaev Vladislav.
Cardboard; cones; plasticine; branches; moss; maple helicopters; pine twig; mushroom.

"Autumn Meadow" Ignashina Sonya.
Natural material, plasticine.

"Autumn tree." Alexei.
The craft is made from maple leaves, black and red rowan fruits. There are barberry berries, acorns, and birch leaves.

"Moose in the forest." Polyakov Elizar.
Moss, fir cones, pine nets, spruce, cotton swabs, plasticine, pebbles, pine bark.

"Cobweb." Lebedev Arseny.
The craft is made from willow branches (cobwebs), chestnuts, and acorns (spiders).

"Birds of the Lakes" Anna Chaprak.
Cones, feathers, plasticine.

"Autumn Girl" Lavrentieva Polina Igorevna.
Work from rowan, leaves, cones, branches and other natural materials, plasticine figurine.

"Delicious basket." Ibraeva Natalia.
A watermelon basket is filled with what's ripe in the garden.

"In the clearing." Makarova Arina.
Made from natural material.

"From the past to the present." MBOU Altai Secondary School No. 1 named after P.K. Korshunov.
Cereals, flowers, fabric, globe, jug.

"Autumn swing". Gaikalova Olga.
The materials used in the work included chestnuts, wild grapes, a plum branch, leaves of various trees, and autumn flowers. The work creates the atmosphere of autumn with all its colors and childhood memories.

"Autumn gifts of nature." Queen Zlata, 9 years old.
Viburnum, pine twig, plasticine, hawthorn, chokeberry, rose hip, maple, spruce and pine cones.

"At the bottom of the sea." Troyanova Sveta, 5 years old.
Shells, moss, shares and rowan leaves, sand.

"All the colors of autumn." Sumenkova Valeria.
Cones. Barberry. Thorns. Heather. Spikelets. Cowberry. Leaves. Rowan. Plasticine. Wood cut.

"Forest spider." Manakov Ilya Sergeevich.
The work was done under the guidance of my mother. Materials: spruce branches, birch and aspen leaves, grape branches, tree sticks, rowan berries, linden blossom, wool thread, plasticine. The child happily collected all the materials in the forest, glued leaves and twigs, and sculpted the details of the spider.

"Autumn Bouquet". Sultanov Maxim.
The bouquet is made of maple and oak leaves.

"Roses in a vase." Knysh Natalya Viktorovna.
The work is made from potatoes. “Roses” are colored with beet juice.

"Gifts of Autumn" Natalya Frolova.
The craft is made from fir cones, rowan berries, dry leaves, artificial flowers and apples.

"Autumn mood". Pelevin Oleg.
Autumn leaves.

"Autumn Fantasy" Zotov Daniil.
This unusual tree is made of dried flowers, berries, pine cones, with scraps of fabric added for beauty.

"Floating Barrel" Sudarikov Ilya.
Materials: viburnum berries, chokeberries, rose hips, chestnuts, cones, chrysanthemum buds, autumn leaves, barrel, a jar of chips covered with clothespins.

"Autumn in the mushroom forest." Asylov Ayaz Ramilevich, 4 years old.
The craft is made from natural materials (leaves of maple, birch, rowan and aspen trees, branches of fir trees, birch and lilac, fir cones and pine needles, plasticine are used). The hedgehog is made of fir cones, pine needles and plasticine. The spider is made of acorn and plasticine. The fire is made of birch branches with flames made of plasticine.

"Magic Tree" Boriskin Dmitry Igorevich.
The work presents a model of an autumn forest. But this is an unusual forest - this forest is magical, fabulous. A magical tree has grown here, on which both fruits and pine cones grow. The foliage on this tree is also unusual. In addition to ordinary leaves, amazing braids of grass are intertwined on it. Well, what about without animals? Fairy-tale hedgehogs and birds rush to feast on the fruits of this tree
Materials: leaves, grass, pine cones, wild apple tree branches, seeds, plasticine, plastic ball. All parts of the work were held together using glue and plasticine.

"Gifts of Autumn." Trofimova Natalya Andreevna with her son Vladimir and daughter Polina.
The work is made of cones, acorns, moss, vines, and decorative elements have been added.
"At the edge of the forest." Ilyin Artem.
The house is made of white cardboard and covered with branches. The roof is a thuja branch. The house has a swan, a puppy, a Christmas tree, and mushrooms made from acorns and cones.

"Spider on the hunt." Kartseva Natalya.
Pumpkin, rowan berries, Spider toy, straw.

"Autumn courtyard." Nesterov Matvey.
The work is made of moss, dried leaves, tree twigs, birch bark, and plasticine.

"Autumn Bouquet". Sokolova Ustinya.
Leaves - oak, maple; cones, flowers, acorns.

"Hedgehogs for mushrooms." Nikita Paderov.
The work is made of materials: potatoes, needles, branches, cones, leaves.

"Miracle Tree" Sycheva Victoria Anatolyevna.
Made from pistachio shells and tree branches. Decorated with decorative leaves and wrapping paper.

Applications made from natural materials
"Autumn beauty." Angelica.
A painting made from natural materials: leaves, flowers, grass.

"Autumn mood". Vereshchaga Georgy, Vereshchaga A.S.
Landscape sheet, watercolor, dry leaves and flowers.

"Autumn has come". Lonkin Egor.
Application of dry leaves (imitating trees) on a watercolor background.

"A bird in a cage and a bird in the wild." Garkushin Nikita.
The work is made of autumn leaves, yarn and cardboard.

"Beautiful flowers." Eminova Karina.
The work is made from sunflower and pumpkin seeds.

"Stork". Radostev Kirill.
This work is made from beans, buckwheat, seeds.

"Butterfly". Mladentseva Sofia 8 years old.
The butterfly is made from beans, seeds, the antennae are cloves, the head is peppercorns, semolina. Frame - cardboard, pebbles, background - chalk.
"Grey Heron". Varov Vladimir.
The work is made of feathers with the addition of dry plants.

Dvoretskaya Julia.
The clock is made from autumn materials (cones, moss, some kind of grass, fly agaric, rowan and lingonberry), cardboard, colored paper and a hot gun.

"Autumn". Torba Roma.
Leaves.

"Autumn Favorite" Anoprikova Anastasia.
A panel made of yellow poplar leaves and thistle seeds (fluff), and corn grits were also used.

"Gifts of Autumn" Sakhipova Adila.
Made from leaves, pumpkin seeds, dates, watermelon and apricots.

"Autumn Bouquet". Zhaldak Maria, 7 years old.
The applique is made from bean seeds, coffee, acacia, buckwheat and ears of corn.

"House in the Forest" Rakhmaev Karim.
Twigs, tree bark, leaves, stones, fibers from coconut shells (roof).

"Porcini". Sakhipov Nurislam.
Application made from cereals and plasticine.

"Autumn hedgehog." Kislyuk Daria.
The work is done in the form of an application. The hedgehog itself is made of paper, glued on cardboard, the hedgehog's spines are made of sunflower seeds, and the mushrooms are made of paper. The picture is decorated with autumn leaves. The herb is made from dried dill.

"Autumn basket of flowers." Loshkin Andrey.
The base is chipboard measuring 60 cm by 100 cm. Transparent adhesive for ceiling tiles is applied in stages, first lay out a basket of dried apricot and plum seeds. Then the flowers are laid out from pine cones, leaves from walnuts, watermelon seeds, bell peppers, and peanuts. Shells of different colors and sizes were used for the flowers and butterflies. The background is made of semolina and glued with PVA glue. For brightness, flowers and leaves were painted.

"Autumn photo frame." Mikheeva Tatyana Vasilievna.
The work was made using the applique technique from natural materials.

"Little Bunny." Belyaeva Irina Ivanovna.
The work is made from leaves and tree branches.

"Magic colors of autumn." Anoprikova Anastasia.
Dried leaves, flowers, sparkles, and small twigs were used in the production.


"Vegetable Train" Klyuev Mikhail.
The train is made of cucumbers, the carriages are filled with berries, seeds, and carrots. The forest is made of twigs.

"Autumn Bouquet". Sakalauskas Andrius.
The basis of the panel is an A4 photo frame. The background of the picture and the vase are colored with colored pencils. The bouquet is made of dried autumn leaves. Acorns are glued to leaves. Their hats are made of black plasticine.

Answer
By the way, such crafts can be done not only in the fall. Our ancestors made only from natural materials all year round :)
Answer
Autumn is a great time for needlework, because it gives us so many wonderful materials: leaves, vegetables, fruits, flowers, acorns, pine cones and twigs. And how cozy a house becomes if you decorate it with yellow and purple tones. In this material you will find 6 ideas for DIY autumn crafts for adults and children with step-by-step master classes and a selection of photos for inspiration.
Idea 1. Autumn topiary
Topiary is a decorative tree that can be used to decorate a dining table, mantel, or front door area. To make it, you can use natural or artificial materials, for example: leaves, berries on twigs, acorns, cones, chestnuts, flowers, dried citrus slices, as well as felt, sisal, linen and whatever your imagination tells you. In the next slider you can see several examples of such autumn crafts.

Materials:
- Clay pot;
- Wooden stick or branch;
- Two polystyrene or floral foam balls;
- Materials for decorating the crown;
- Dry moss (you can replace it with sisal);
- Glue gun and several glue sticks;
- Scissors;
- Side cutters or pruning shears;
- Acrylic paints for painting the trunk, ball and pot (optional).
Instructions:
Step 1. Cut a hole in the base ball with a sharp tool for the barrel, about a third of its diameter deep. Place a drop of hot glue into the hole and insert the barrel into it.
Step 2: Insert the second ball into the pot. If the ball does not sit tightly enough in the pot, place newspaper around it. Cut a hole in the ball for the trunk, 2-3 cm deep. Insert the trunk with the crown into the hole and adjust its length. Next, drop glue into the hole of the ball, place the barrel in it and begin to fill the hole with glue, placing small pieces of paper around the barrel. This is necessary so that the hot glue does not deepen the hole too much.

Step 3: Paint the pot the color you want if you don't like the original look. In this project, the pot was painted with spray paint in a dark bronze shade from Rustoleum (sold in construction stores, for example, in Leroy Merlin).

Remember that the design of the pot should be simple and unpretentious so as not to distract attention from the crown. If necessary, paint the barrel and/or balls at this stage. It is advisable to paint the balls so that the gaps between the decorative details are invisible.
Step 4. While the paint on our blank is drying, sort the decorative parts by type and size. If you use artificial leaves, flowers and berries with a wire base, then when cutting them, leave “stems” about 2 cm long. This is necessary in order not only to glue the parts, but also to stick them into the ball - then they will hold more securely . If the “stems” do not have wire, then it is better to cut the parts “at the root”.
Step 5. Now it's time for the fun part - creating the crown. First, evenly distribute and glue the largest parts onto the ball, then the middle ones. Finally, fill in the gaps with small embellishments.

Step 6. Well, that's all, all that remains is to decorate the ball in the pot with dry moss or sisal, after treating it with glue.
Idea 2. Pumpkins made from toilet paper rolls
Here's another vegetable-themed fall craft idea you can make with your kids - pumpkins made from toilet paper rolls. The possibilities for decorating these crafts are endless. For example, children can use colored paper, gouache or glitter, while adults can use gold leaf, fabric or lace.

Materials:
- Toilet paper or paper towel rolls;
- Scissors;
- Leg-split;
- For decoration: brushes, gouache or acrylic paints, PVA glue and glitter or book pages, etc.;
- Cinnamon sticks or sprigs (to create the core of the vegetable);
- Burlap, felt or cardboard (for creating leaves).
Step 1: Flatten the toilet paper roll and cut into rings.

Step 2: Decorate the rings with a material you like, such as craft paper, scrapbooking paper, fabric, ribbon, or simply paint them with acrylic paint. You can also decorate pumpkins exactly as in this master class - with glitter and stripes of book pages.
Method 1. Using a brush, coat the outer sides of all rings with PVA glue, and then sprinkle plenty of glitter on them. Wait until the pieces dry, and then cover the glitter with a second layer of PVA glue to protect it from falling off.

Method 2. Cut thin strips of paper from book pages and glue them to the rings using PVA glue or a glue stick.

Step 3: To shape your pumpkin, pass a strand of twine through the rings, then tighten the two ends and tie a knot as shown in the photo.

Step 4. Now glue cinnamon sticks or cut branches into the center of the pumpkin.

Step 5. Hurray, your pumpkins are almost ready, all you have to do is add leaves cut from burlap, felt, cardboard or any other material you have on hand.

Using the same principle, you can make a pumpkin from rings of any material.

Idea 3. Panel of leaves
Next, we present to you an idea for crafts made from autumn leaves. Since this master class does not use hot glue or sharp objects, you can safely involve children in the work, and especially in collecting material.

An idea for an autumn craft made from natural materials that you can make with your children and use for seasonal home decoration
Materials:
Instructions:
Step 1. Cut out the wood with a jigsaw and sand the ends with sandpaper.
Step 2. Paint the board with stain and leave to dry.
Step 3. Using a marker, draw a maple leaf on the board by hand, using a template or stencil.

Step 4. Start gluing the pre-dried leaves (see how to dry them at the end of the article) like a fan, trying to place them so that their edges coincide with the outline of the picture. At the same time, you should not glue the leaves completely; let their tops be a little loose so that the panel gains some volume. Place a press of suitable size on each glued leaf for a minute.

Keep in mind that the leaves will not stick immediately, but after the glue dries they will stick well.

Step 5. To make the outlines of the design clearer, trim the leaves in some places. However, try to resort to such correction as little as possible so as not to lose the beauty of natural lines.
Step 6. Now attach the twig to your panel in place of the stem, break off the excess and glue it.

The following selection of photos presents examples of no less original autumn panels.

And finally, we suggest watching a video tutorial on how to make an autumn craft with your own hands in the form of a panel of leaves with a frame of acorns.
Idea 4. Wind chimes made from natural materials and more
The following project is an example of an interesting, but very easy-to-make craft from natural materials and ready-made parts, which a child can make almost independently.

Materials:
- Two or one sticks;
- Natural and manufactured materials for decorating threads: pine cones, flat stones, acorns, wooden beads, small metal candle stands (used in this project) and anything else that comes to hand and matches the fall theme;
- Leg-split;
- Hot glue gun and glue sticks.

Step 1. Paint some elements of the future wind chime, if necessary. In this master class, the author painted the pebbles in bright yellow and red colors.

Step 2. While the decorations are drying, tie two sticks crosswise and tie the center of the cross with twine as shown in the photo below. You can also just use one long stick or, say, a hoop.

Step 3. Cut 9 ropes of twine to the desired length with a small margin for knots, so that in the future you will have two rows on each branch and one in the middle.
Step 4: To create one row of wind chimes, take a piece of twine and begin stringing beads or other pieces onto it, passing the strings through the holes twice at a time or tying them well into knots. The stones should be additionally fixed with hot glue. In order not to make a mistake with the order, the parts should first be arranged in the desired order. By the way, it is better to place especially sonorous elements opposite each other so that their chime in the wind can be better heard.


Step 5. Tie knots at the end of each rope.

Step 6. Once each thread is completed, tie them to the branches using double knots with a drop of glue added.


Below are other examples of this unusual decoration made from pine cones, acorns and leaves.

Idea 5. Candlesticks in the shape of autumn leaves made from salt dough
Leaves can be used not only as a decorative or finishing material, but also at the same time as a template and stamp for creating crafts from any modeling mass. Take note of the idea of autumn crafts with children in the form of these cute salt dough leaves. By the way, they are not only beautiful in themselves, but can also perform a practical function, for example, you can store various decorations on them or put candles on them.


Materials:
- Ingredients for kneading salt dough: ½ cup salt, ½ cup water, 1 cup flour;
- Container for kneading dough;
- Glass bowl;
- Rolling pin;
- Large leaves;
- Vegetable oil;
- Acrylic paints in yellow, red, orange and brown.
Instructions:
Step 1. The first thing to do is go for a walk with the whole family and find at least two beautiful large leaves.
Step 2. Then knead the salt dough. To do this, simply mix all the ingredients and roll out the dough to about 6mm thick (no less), so that it is not too thick, but not too brittle.
Step 3: Place your leaves on the dough and run a rolling pin over it using light pressure.


Step 4: The next step is to cut out the shape around the leaf. Use a sharp knife and, of course, take this part of the work yourself.

Step 5. Remove the leaves. Invert the glass bowl and coat it with a thin layer of vegetable oil.

Step 6: Carefully lift the sheets and place them on the bowls.

Step 7. Place the bowls with the dough in the oven preheated to 250 degrees and leave them to bake for 2-3 hours.

Step 8: Remove your pieces from the oven and let them cool in the bowls for about 15 minutes. Then carefully lift the leaves and leave to cool completely.

Blanks
Step 9. Once the bowls have cooled, start painting. To do this, pour paints of each color into cups and let the children mix them themselves and paint the inside of the leaves first, and then the outside. Crafts made from salt dough are quite fragile, so you need to paint them carefully, without pressing. Wait for the paint to dry and, if desired, cover the bowls with a layer of PVA glue. It will give the craft a matte finish and make it a little stronger.

Painting the bowl
Leaf shapes may vary.

By the way, if you don’t want to bother with salt dough, you can replace it with soft plasticine. The photo below shows an example of such a craft.

Idea 6. Felt garland
Although felt is not a natural material, crafts made from it turn out to be the most autumnal. Today we invite you to make a simple garland from felt leaves.

Materials:
- Several sheets of felt in fall colors;
- Leg-split;
- Scissors;
- Glue;
- Thick threads with a needle;
- Pencil.
Instructions:
Step 1: Download and print the leaf templates (see downloadable template below), then cut them out and outline them.
Step 2. Cut out the blanks.
Step 3. Sew the veins by hand using large stitches.
Step 4. Now, maintaining equal intervals, hang the leaves on the twine. To do this, wrap the tail of each leaf around the twine and secure with glue. If you wish, you can sew on the details. Woo-ala, the autumn felt garland is ready!

Using the principles of this simple master class, you can create a variety of garlands with decorations in the form of acorns, pine cones, pumpkins, etc. The following selection of photos shows some examples of autumn felt garlands.

How to dry leaves and flowers
Method 1. This method is suitable if you want appliques or other non-voluminous crafts. Place leaves or flowers between the pages of the book at a distance of about 3 mm from each other and move them to other pages every day (also maintaining an interval of 3 mm). Within a week, the paper will absorb all the moisture from the plants, and you will be able to use them for creativity.
Method 2. If your craft does not involve the use of flat leaves, then you can dry them by simply collecting them in a bunch and hanging them upside down in a dry but ventilated area. At the same time, keep in mind that the leaves will lose their color completely in the sun, but will retain their color in the shade.
Method 3. This method is suitable for drying and preserving the color of leaves and cornflowers. Blot fresh, just picked leaves/cornflowers with a napkin if they are wet. Place each sheet between two layers of wax paper, and place a paper towel on top of the resulting “sandwich.” Preheat your iron and make sure the steam setting is off. Using pressure, iron the paper towel for 2-5 minutes. Turn the sandwich over and pat it again through the paper towel, then carefully remove the wax paper.
- To prevent dried leaves and flowers from breaking, they must be dipped in a solution of water and PVA glue, diluted in a ratio of 4:1, and then left to dry.